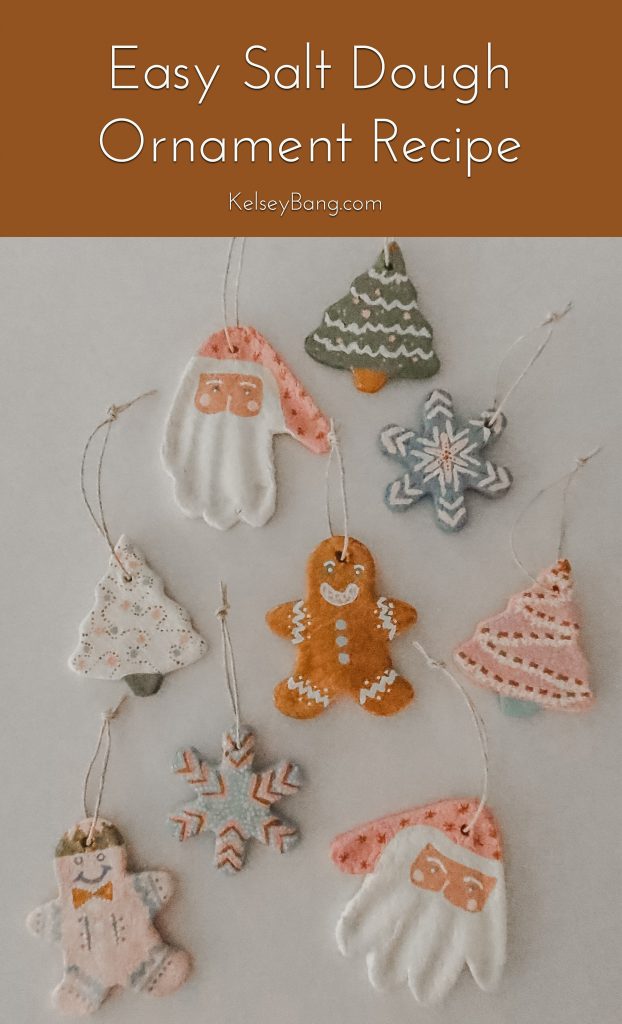
Looking for a simple and easy craft to make for the holidays?!?! Try making salt dough ornaments! These are super fun and easy to make you will be wanting to make them every Christmas! These are also great to make with little ones. Plus these also make great gifts and present toppers!

Easy Salt Dough Ornament Recipe
Growing up my mom worked at Morton Salt. She was a big salt fan and was always finding ways to incorporate something “Morton Salt” into our routine. Christmas time I have fun memories with her making salt dough ornaments. The past few days my girls and I had so much fun making salt dough hand print ornaments! I wish I would of remembered how fun it was to make these because I would of been making these every Christmas. Salt dough ornaments are so easy to make you will find yourself wanting to make these holiday.
Over the past few days I have tried a few different salt dough recipes. I took what I liked from each of them and came up with this recipe.
Plan on about 20-30 minutes for making the dough/ornaments. 2-3 hours for ornaments to bake. And a good amount of time to paint/decorate ornaments.
Ready!?!!… Let’s get started!
(also big thanks to @woodthatbesomethin for the darling Santa handprint idea!)

Ingredients
3/4 – 1 Cup Warm Water
[spacer]
Supplies
Small Paint Brushes/Tooth Picks
Polyurethane Spray or Mod Podge – to preserve the ornament
Ribbon/Twine/Yarn– to hang the ornaments
This recipe can be doubled (4 cups flour, 1 cup salt, 1 1/2 cup water), tripled (6 cups flour, 1 1/2 cup salt, 2 1/4 cup water), etc. I found I like working with a smaller amount of dough since this dough dries out pretty fast. This recipe will make about 10-12 small ornaments.
[spacer]


Directions
Before you start your dough, preheat oven to 225 degrees.
Make The Dough
In a mixer combine flour and salt. (I used the cookie paddles on my mixer to mix. You can also put all the ingredients in a large mixing bow and mix by hand.) Slowly add in the warm water while continuing to mix the flour and salt. Start with 3/4 cup of water and mix.
Once the dough starts to come together keep mixing for about 3 minutes. If dough is still a little flaky, slowly add in a little more hot water while it’s still mixing till you get more of a thcik play dough type of texture.
Time To Roll The Dough & Cut Some Ornaments
Take the dough out of the mixer and kneed the dough till its pretty smooth.
Lay down a large piece of parchment paper or Silpat mat and put the dough on top of it. Using your rolling pin, roll the dough until it is about 1/8″ thick. Try to get as close as you can to 1/8″ to help prevent ornaments from cracking or bubbling when baking.
Now for the fun part! Grab your cookie cutters and cut out some shapes! Keep the cut out parts on the parchment paper. If you are doing a hand print, I recommend doing those first. Place the hand on a large area of the dough. Push the hand and move the fingers side to side to get a deep impression in the dough. After you have made the hand print use a large cookie cutter, or a knife to cut around the shape.
Once you are done cutting your shapes, remove the excess dough leaving the ornaments on the parchment paper/Silpat.
With your excess dough, roll it out on another sheet of parchment paper and create more ornaments, or throw the excess dough away.
Time to make holes for the ornaments to hang. You can use a drinking straw to poke the holes, or a toothpick.


Time To Bake
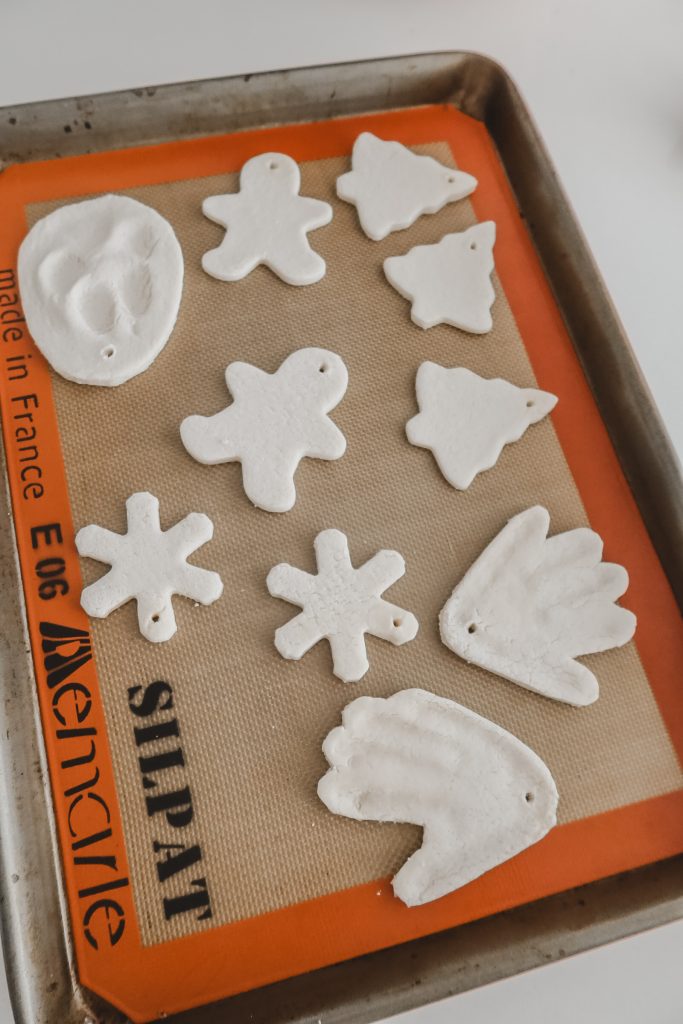
Transfer your parchment paper/Siplat with ornaments on it to the baking sheet. Put the baking sheet in the oven (at 225 degrees) and set a time for 2 hours. I found cooking at a low heat helps the ornaments to not bubble but takes longer to bake. After 2 hours check the bottom of your ornaments to see if they have been fully baked. If not, add 20 more minutes to the time until they are baked all the way through. The thinner the ornaments, the less bake time. The ornaments are done when the underside of the ornament starts to slightly brown.
Paint Time
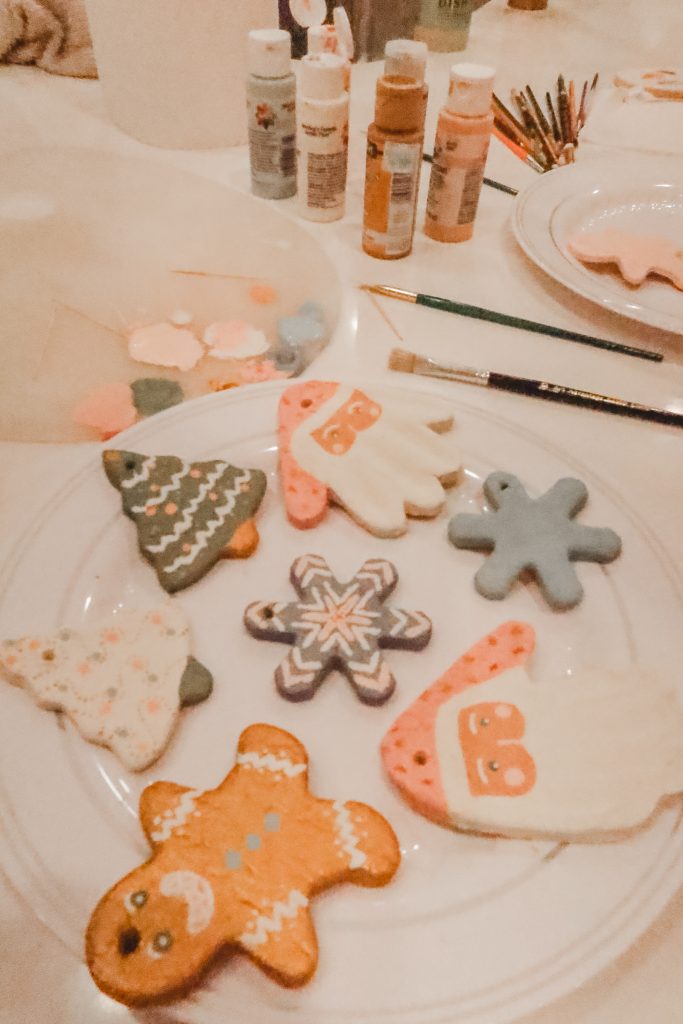
Let the ornaments completely cool off before decorating. This is the fun part, have a good time! Grab your spray paint and spray the ornaments. Or if you want to do what I did, grab some acrylic paints and paint brushes. Start painting and see what you can create! Just have fun! Toothpicks are a great way to draw little details. Puffy paint and glitter could also be really fun!
Once the paint is done drying, to help preserve the ornaments; add a layer of mod podge or polyurethane spray.
For the final touch, add some twine or a ribbon to your ornaments and hang on the tree! DONE!
Tips & Tricks With Salt Dough
If your dough is feeling a little flakey after mixing, slowly add in a little more hot water. Add water slowly to create the wanted constancy.
This dough drys out pretty quickly. After you roll out your dough start to cut out shapes or make your hand prints.
If you have a cute pup or pet, make sure to keep the salt dough ornaments up high where they can’t get them or eat them. Salt dough can be very bad for them if they eat it.


Paint Colors I Used
I had some requests asking what acrylic paint colors I used so thought I would list them here. Craft stores, Walmart, all great place to buy paints. I found these all at Hobby Lobby. You can also add these colors to the Light Ivory to make any of these colors lighter. That is what I did for Santas cheeks with the Pink Seashell to make it lighter.
Delta Creative – Pink Seashell 03046
Delta Creative – Light Ivory 02401
Delta Creative – Sea Foam 02675
Delta Creative – Tawny Medium 02126
Delta Creative – Wedgewood Green 02070


If you get a chance to make salt dough ornaments, tag me in your posts! I would LOVE to see what you create! Thank you so much for stopping by today! Hope you have a wonderful day.
[spacer]
If You Liked This Post, You Might Like These Posts
How To Make A Pom Pom And Tie It On A Present
11 Simple Ideas To Add Holiday Cheer To Your Children’s Space
Favorite Places To Shop For Unique and Cute Christmas Decor
15 Quick And Easy Neighbor Gift Ideas On A Budget
Favorite Christmas Board Books
[spacer]
Shop The Post
Easy Salt Dough Recipe
Equipment
- rolling pin
- cookie cutters
- siplat or parchment paper
- baking sheet
- acrylic paint
- small paint brushes
- tooth pick or straw (to make holes for ornaments)
- mod podge (to help preserve the ornaments)
- ribbon, twine or yarn to hang ornaments
Materials
- 2 cups all purpose flour
- 1/2 cup salt
- 3/4-1 cup warm water
Instructions
- Before you start your dough, preheat oven to 225 degrees.
Make The Dough
- In a mixer combine flour and salt. (I used the cookie paddles on my mixer to mix. You can also put all the ingredients in a large mixing bow and mix by hand.) Slowly add in the warm water while continuing to mix the flour and salt. Start with 3/4 cup of water and mix.
- Once the dough starts to come together keep mixing for about 3 minutes. If dough is still a little flaky, slowly add in a little more hot water while it’s still mixing till you get more of a thick play dough type of texture.
Time To Roll The Dough & Cut Some Ornaments
- Take the dough out of the mixer and kneed the dough till its pretty smooth.
- Lay down a large piece of parchment paper or Silpat mat and put the dough on top of it. Using your rolling pin, roll the dough until it is about 1/8″ thick. Try to get as close as you can to 1/8″ to help prevent ornaments from cracking or bubbling when baking.
- Now for the fun part! Grab your cookie cutters and cut out some shapes! Keep the cut out parts on the parchment paper. If you are doing a hand print, I recommend doing those first. Place the hand on a large area of the dough. Push the hand and move the fingers side to side to get a deep impression in the dough. After you have made the hand print use a large cookie cutter, or a knife to cut around the shape.
- Once you are done cutting your shapes, remove the excess dough leaving the ornaments on the parchment paper/Silpat.
- With your excess dough, roll it out on another sheet of parchment paper and create more ornaments, or throw the excess dough away.
- Time to make holes for the ornaments to hang. You can use a drinking straw to poke the holes, or a toothpick. (You can also use forks/toothpicks to create fun markings/patterns on the ornaments before they are baked.)
Time To Bake
- Transfer your parchment paper/Siplat with ornaments on it to the baking sheet. Put the baking sheet in the oven (at 225 degrees) and set a time for 2 hours. I found cooking at a low heat helps the ornaments to not bubble but takes a lot longer to bake. After 2 hours check the bottom of your ornaments to see if they have been fully baked. If not, add 30 more minutes to the time until they are baked all the way through. The thinner the ornaments, the less bake time. The ornaments are done when the underside of the ornament starts to slightly brown. Baking may take up to 4 hours.
Paint Time
- Let the ornaments completely cool off before decorating. This is the fun part, have a good time! Grab your spray paint and spray the ornaments. Or if you want to do what I did, grab some acrylic paints and paint brushes. Start painting and see what you can create! Just have fun! Toothpicks are a great way to draw little details. Puffy paint and glitter could also be really fun!
- Once the paint is done drying, to help preserve the ornaments; add a layer of mod podge or polyurethane spray. My favorite is the matte mod podge.
- For the final touch, add some twine or a ribbon to your ornaments and hang on the tree! DONE!
- I would love to see your creations you make! Tag me @HangWithTheBangs 🙂 Hope you had fun! Happy holidays!


Emma
August 9, 2021These are adorable. Perfect activity for the winter school break .Thanks for sharing!
Andrea
December 3, 2021I’m not sure what I did, but they all ballooned up in the oven!